Used Grey as new background to look better.
Thursday 30 April 2009
Thursday 30th April
Wednesday 29 April 2009
Wednesday 29th April
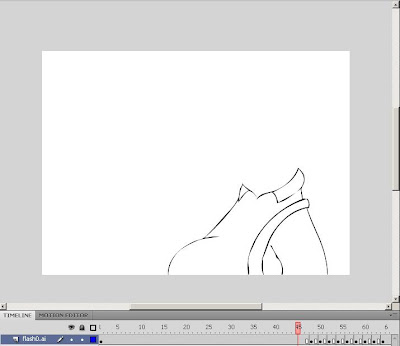
Finished Inking in Mort
Placed Pink to make sure i am colouring properly. Used a colour that wouldn't be used.
EXPLAIN STUFF
Tuesday 28 April 2009
Monday 27 April 2009
WEEK 2
Mon 27th April
Anja asked me to do up the fish animation again. With no exact key frames or exact timings it will be hard for me to get it true to Anja's vision. I will try as she suggested. If it isn't good enough and requires even more redoing then I will have to pass the job as I need to manage my time for other work, especially Daryl's inking.
I showed Harrison how to ink in so that he can start inking some scenes in.
Sunday 26 April 2009
Sunday 26th April
Saturday 25 April 2009
Friday 24 April 2009
Friday 24th April
Finished animating newer fish sequence..
Anja explained to me to me that she wanted the fish to swim up to each other befroe waiting and ahev attempted to do this.
I hav also finished animating up some propellors for the bomb scene.
Thursday 23 April 2009
Thursday 23rd April
Showed Anja possible fisheye lens effect for shot that she wanted from after effects. Added some animation to fish at beginning. Anja wanted fish to slowly move towards each other then sway for a little bit before swimming away. She also wanted the fish to sway its fins on the spot. This is of course unrealistic for the actual behaviour of a fish but Anja wanted this regardless. As I have already used a motion path, it is possible for me to extend the motion path and adjust at either end of the curve, although this has proved quite difficult to do properly and requires quite a lot of care and precision in order to preserve the animation that is already their, but it is definately possible.
Other than this Me and Heba were not given any texturing to do, even though we were asked to meet up for this. Instead we only gave our input to her work and she wanted nothing else for us.
Back to Daryls project I guess..
Wednesday 22 April 2009
Wednesday 22nd April
Gave my input to Anja on her work. She wanted suggestions on her background of the bomb scene. I thought her paper design looked really nice although the inside of the bomber wasn't very clear. I suggested that she experiment merging both styles she has, keeping the origami paper look, but merging the texture of the inside of the bomber with it to have the best of both. In order to work well I suggested that it should be lightened though as it was quite dark. Though the inside of the bomber needs to be dark, i felt it needs to be lightened in order for shadows to be made clear from the above propellors, giving the origami feel to it. Of course paper textures will be needed but that is what me and Heba will be concentrating on tomorrow.
Here is a comparison I found between Flash and Illustrators live trace functions, showing the difference in how you can use them.
http://www.http.com//edutechwiki.unige.ch/en/Flash_bitmap_tracing_tutorial
(Edited: that link appears to be down now but fortunately Daryl saved the webpage to his blog)
http://drtani303.blogspot.com/2009/04/tutorial-for-illustrator.html
This was definitely a nice tutorial to help us understand how the live tracing works but more experimentation is required in order to find the best use of this tool.
After looking into it myself I have found that the best way to use illustrators live trace for our 2D images is ‘One Color Logo’. This converts it to vector whilst keeping it slightly rough look which is nice evidence of it being hand drawn, but also makes it look slightly more straight and curvy as a vector image would look which is fine. Cleanup will inevitably be needed still in flash to remove random fragments of drawing around and inside the lines, but this is still the best function so far for producing a nice trade off between computerized and hand drawn imagery for the film.
After using this technique to convert the image to vector it can then be simply dragged into an open flash file and imported as a vector image in flash.
This window the comes up. I find it important to select these options as shown. Maintain layers by default is on, but i switch it off because otherwise it keeps whatever layers you have in illustrator and moves them into flash. Obviously we don’t have any layers in the illustrator file, although it will create a new separate layer with the new image if this is selected. So to stop a massive build up of separate layers i leave this off.
With this new file you then right click and select ‘break apart’. After doing this a few times it will be completely broken down to simple flash vector geometry.
The image can then be manipulated just like any other flash vector image, which means colouring it in is relatively simple. The only thing that isn’t simple is when gaps occur in the drawings. These need to be filled manually in flash before filling it with colour.
Tuesday 21 April 2009
Daryl showed us that Sam created a logo and title sequence for the professor. I wasn’t too sure whether it would fit into our film or not. No one else seems to mind and it is finished so it makes sense to leave it for now. We can always come back to it later if needed. Best to get moving on everything else at this stage.
Monday 20 April 2009
Term 3 – Week 1
Monday 20th April - In Anja's group it has been organised so that me and Heba will do a little texturing in the coming weeks. Mehmet expressed that he is happy to continue modelling but wished others to help with texturing. Me and Heba now just need the required files and help with direction in order to fulfill this.
Animated Fish for Anja. Used motion paths for the fish to make it easier. The reason for this was so that theoretically I could draw a line in maya for the exact route i want the fish to go. This helps as it means i can clearly see how the fish will move and will hopefully save time rather than moving the fish almost every frame and keyframing. This is also easier because it means I only have to keyframe main points of the animation. The main body of movement is calculated automatically when you set how many frames the line lasts for. But of course you can keyframe or change this yourself to make the fish stop on route for example. Using motion paths is also helps a lot for teh animated body parts. As the body movement sets itself up first, it
I also only animated the referenced fish so that... in theory... opening the scene maya file should automatically import the referenced fish WITH animation in each position so each fish will animate exactly the same in sync with each other. As shown this was NOT the case.
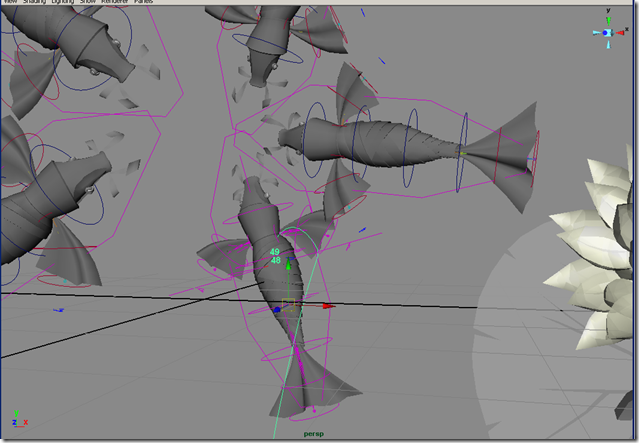
Unfortunately there were many problems although it partially worked. The files were in fact replaced with the referenced animated fish although for some odd reason unknown to me, the position of the referenced objects were reset to the center of the screen. (oddly enough except one fish). In the picture above I have moved the fish away from the center so you can see that they all did in fact import with their animations, just in the wrong places. This meant I had to move and replace each fish back into their original (or close to) positions. I don't think the end result looks too bad and for my first proper maya animation attempt I am quite proud.
Sunday 19 April 2009
End of holidays
Over the Easter holidays I did use this time to relax, but also used this time wisely. Second week of holiday was reserved for me going on work experience to The Joint, a small Post Production company, which was great I might add. I then continued working on animating Anja’s paper cranes.
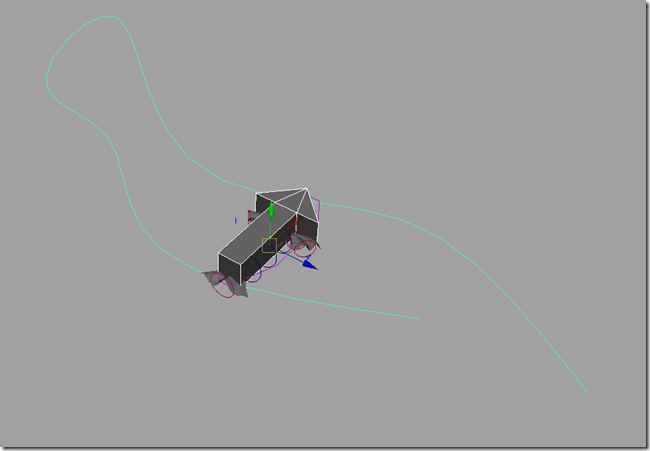
I started by creating a curve. I did this from the Top view in Maya so that the line will be created aligned in that view. Theoretically this should mean that when a model is attached to the curve as a motion path it will always move along the line aligned along with the Top View. Or in other words if a model is attached to it then the model should be standing upwards correctly.
I turns out this isn’t the case at all. Below shows some mages of my attempts to attach a model to the curve as a motion path.
In case it would skrew up the fish somehow I decided to test it on a separate model of an arrow created of equal size to the fish.
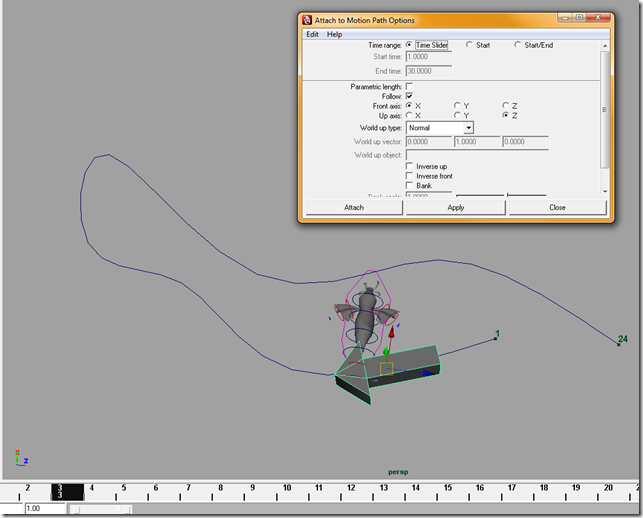
When attached to the curve it seemed to rotate 90 degrees. It was in fact facing the right direction though.
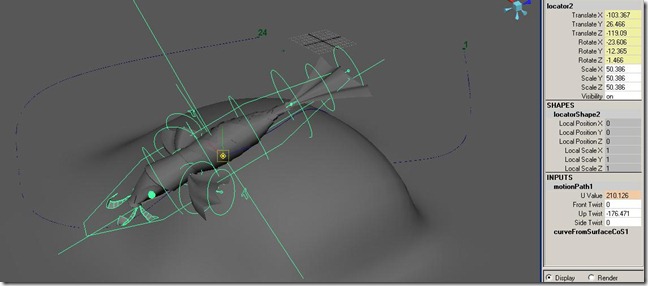
After a while of experimentation I worked out that these settings enabled the model to be properly connected to the motion path.
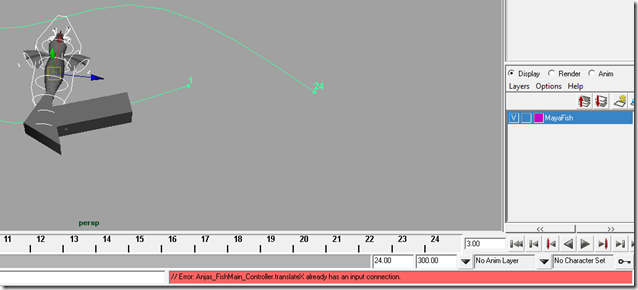
I then attempted to add the fish to the curve by selecting the fish’s main controller and adding it to the curve as a motion path. Unfortunately this error occurred. I wasn’t entirely sure what this meant so I tried deleting history to see if it made a difference.
Low and behold it worked! The fish is now attached to the motion path. Although now it decided not to attach inline with the curve like the arrow did.

I then finally got the fish on the curve correctly. To test I recreated a curve that had been projected onto a bumped surface. As the picture shows the fish follows the motion path straight over the bump as it should.
Unfortunately again, after getting it working and animating the body on the line the main scene file didn't import the new reference. So instead I imported it again and repositioned them.
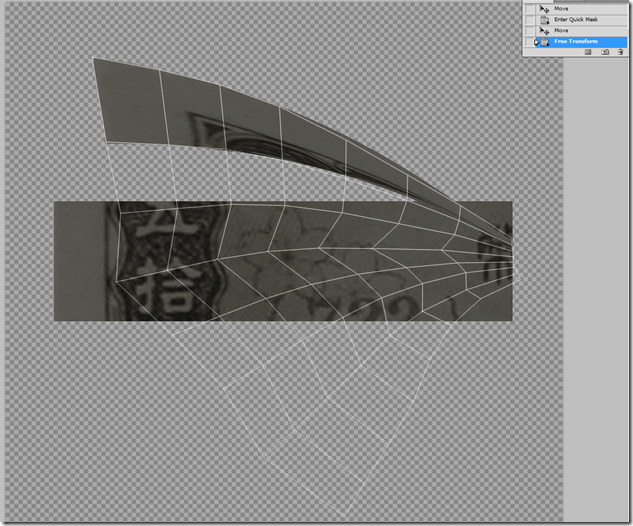
I also tried to texture the fish too as Anja asked me too. Here is an example of a UV of the fish’s fin and how i added the texture.
It’s a bit tricky to do as bits such as this can often happen.
This is the fin finished.
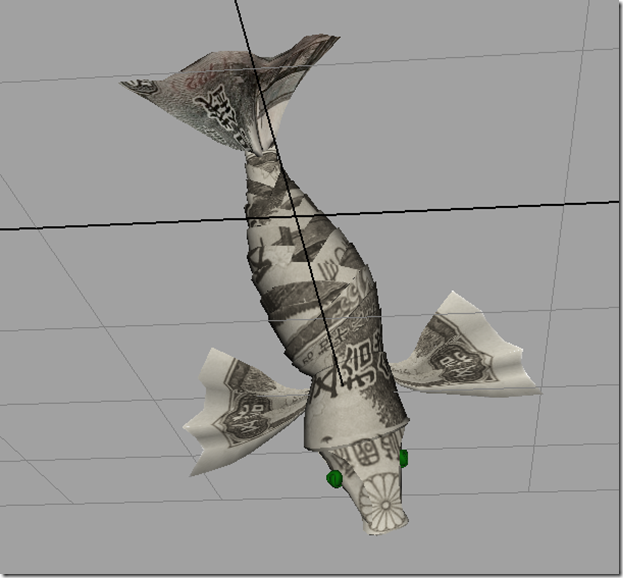
And the whole fish. I decided to texture it from a Japanese Yen note. I found an image on an old Yen note that would suit the period and place that our film is based from.
click for better picture
And below is a playblast of the finished animation...


